Block Printing 101 : Things you will need
I started block printing extensively after coming to the USA in 2016. While my method isn't traditional to India, I learnt traditional Indian block printing and found a way to adapt the materials and process to what is available in the USA. With that in mind, I tested several inks, methods and fabrics to see what works best. I have finally gotten around to creating a blog post to share my knowledge and experience.
I am breaking up this series into four parts:
- Things you will need
- Prepping the materials
- How to block print
- Fabric after care
Lets begin!
Block Printing 101: Things you will need

Materials needed:
- Block Printing Inks
- Wooden blocks
- Acrylic or plastic trays
- Rubber brayer
- Fabric to print
- Several sheets of fabric to create a padded surface
- Nail brush
1. Inks
The key factors I kept in mind while choosing inks was colorfastness, ease of use and impact on fabric. It is an absolute shame to block print for several hours and then have the print fade or alter significantly after every wash. It feels like all beauty is lost after extensive work. It was also important for me to be able to source the inks easily and to have them be cost effective. They also needed to be smooth to apply. The most important factor for me however, was how the fabric felt to touch after printing. For example, if you use acrylic or fabric ink on fabric, the fabric tends to stiffen up and does not feel smooth on the skin. It also doesn't drape as well if used on clothing or home décor.
Keeping all of this in mind, my personal favorites to use are Jacquard Versatex Screen Printing Inks for my basic solid colors. They blend well to create new shades, I use Lumiere by Jacquard for my metallic shades like gold, silver, rose gold and such.
Other available inks are Blick Block Printing Inks and Speedball Block printing inks .
I would not recommend using acrylic inks for printing, as they do alter the texture of the fabric and since they dry very quickly, it is difficult to clean the blocks after usage.
2. Wooden blocks or rubber stamps
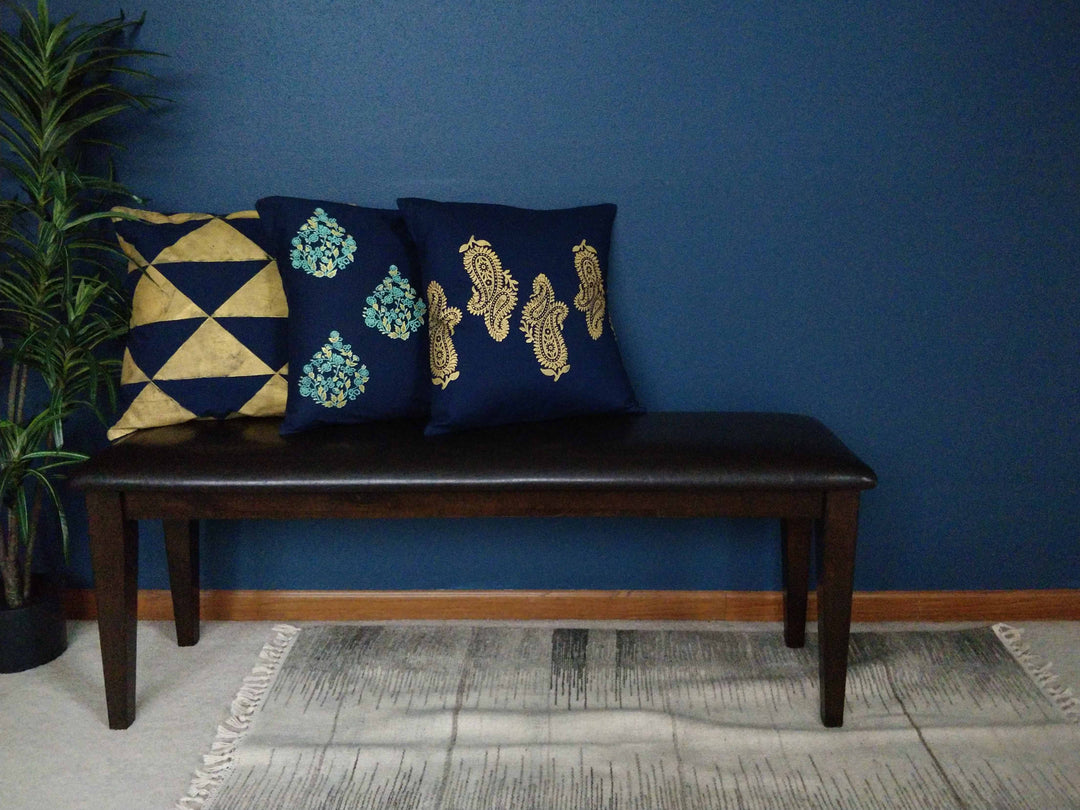
I personally source my wooden blocks from artisans in India. The blocks are hand carved by the artisans and are made using teak wood. Use can source the blocks via Amazon or Etsy. I don't have a reliable online vendor to recommend at this time.
An alternative to using wooden blocks is to use rubber stamps, or even try 3d printing a designing or having a wooden block laser engraved through local businesses. I have not tried these options but have seen others do so.
3. Acrylic or plastic trays
You will need a smooth surface to apply the ink and spread the ink on using a brayer. You could also use foam meat trays. I found mine from my local craft store
4. Rubber brayer
I prefer using soft rubber brayers to apply a even coat of ink on the block before printing. You could also use a hard brayer, but I don't recommend it.
5. Fabric for printing
My personal preference is to print on natural fiber fabric like cotton, linen or silk. I choose fabric with a tight weave so the motif printed is clean and crisp. You can print on any fabric actually, but I would highly encourage you to test a print on a small sample before committing to a large piece of fabric. On some poly- blend fabrics, the ink can bleed. I enjoy printing on quilting cotton fabric.
6. Sheets for padded surface
Creating the right environment to block print can make a world of a difference. I would recommend creating 5-7 layers of fabric, to create a padding. The fabric to print on will be placed over this surface. I will cover this in more detail the next post. I would highly recommend searching your local thrift store to find sheets for this purpose. They will get stained with ink.
7. Nail brush
It is important to clean the blocks right after block printing. I like using a regular nail brush as it cleans the small grooves in a block and is gentle to use on the block. You could also use a simple toothbrush.
Click here for Part 2 : Block printing 101: Prepping the materials